
A practical solution for persistent punctures or sidewall damage that sealant cannot fix is inserting a tube into a tubeless tyre. While tubeless systems are designed for efficiency and durability, a tube can come in handy in the event of an emergency. With the right tools and careful attention, individuals can insert a tube in a tubeless tyre to restore function.
Insert a Tube in a Tubeless Tyre
One of the commonly used car tyre types, tubeless tyres provide improved puncture resistance and enhanced safety. However, that doesn’t mean they cannot be punctured. If stuck in an emergency, there are ways to use a tube in a tubeless tyre and get the vehicle running. This is commonly done in emergencies or when a permanent tubeless repair isn’t immediately possible.
Listed below is the step-by-step process of tubeless tyre tube installation:
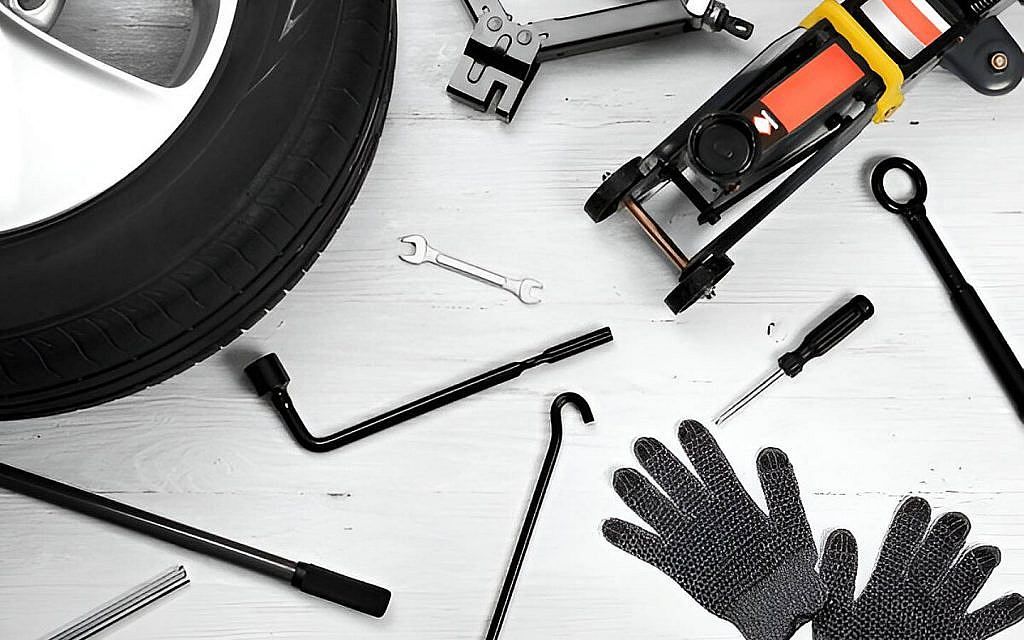
Tools and Materials Needed
The following materials are required for installing an inner tube in a tubeless tyre.
- Tyre levers
- Bicycle or car pump (depending on vehicle type)
- Compatible inner tube
- Patch kit (optional, if reusing an old tube)
- Clean cloth or rag
- Soap and water (for checking leaks later)
Step 1: Remove the Wheel
Start by safely lifting the vehicle or bicycle and removing the wheel with the affected tubeless tyre. Make sure the wheel is securely detached from the frame or axle before proceeding.
Step 2: Deflate the Tyre Completely
Release all remaining air from the tyre. For tubeless setups, this involves removing the Presta or Schrader valve core or simply depressing the valve to release pressure. Ensure the tyre is completely flat, as this makes the bead easier to break.
Step 3: Break the Tyre Bead
Carefully unseat the tyre bead from the rim using tyre levers. Start at one point and work around the tyre until one side is fully off the rim. This may require additional effort in tubeless setups due to their tighter seal.
Step 4: Remove the Tubeless Valve
Unscrew and remove the tubeless valve stem from the rim to create space for the new inner tube valve. Ensure the valve hole is clean and free of sealant or debris.
Step 5: Inspect the Tyre and Rim
Check the inside of the tyre and the rim for sharp objects, debris or old sealant residue. Any remaining thorns, nails or sharp edges should be removed to prevent puncturing the new tube.
Step 6: Insert the Tube
The next step is to insert a tube in a tubeless tyre. Slightly inflate the inner tube just enough to give it shape. Insert the valve through the rim hole, ensuring it sits straight. Carefully tuck the rest of the tube inside the tyre, making sure it lies flat without twisting or folding.
Step 7: Reseat the Tyre Bead
Starting opposite the valve, begin working the tyre bead back onto the rim using hands or tyre levers. Take care not to pinch the tube between the tyre and rim. Finish at the valve area, ensuring the valve stem is aligned and upright.
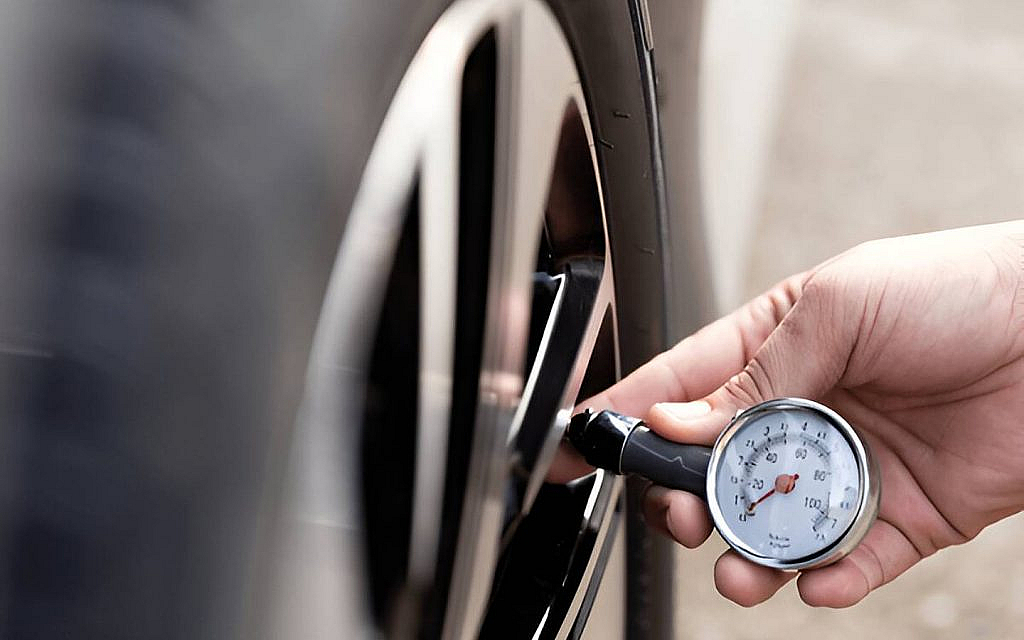
Step 8: Inflate the Tyre
Gradually inflate the tyre using a bicycle pump or a car pump. Pause halfway to check that the bead is seated evenly around the rim. Continue inflating to the recommended pressure specified on the tyre sidewall. Confirm that the valve remains straight and seated.
Step 9: Check for Leaks
Spray a mixture of soap and water around the edges and valve area to identify any escaping air or slow leaks in tyres. Bubbles will indicate a leak. If a leak is found, deflate the tyre and reseat the section carefully before reinflating. Additionally, check for tyre bulges and fix them before reinstalling the wheel.
Step 10: Reinstall the Wheel
Once the tyre is fully inflated and confirmed leak-free, place the wheel back onto the vehicle or bicycle. Secure all bolts, nuts or quick-release mechanisms properly and test for alignment before use.
FAQs
Is It Safe to Ride With A Tube In A Tubeless Tyre?
Yes, it’s safe to ride with a tube in a tubeless tyre as a temporary solution, but it’s not recommended for long-term use.
When should I consider inserting a tube into a tubeless tyre?
You should insert a tube into a tubeless tyre if it has a large puncture that can’t be sealed with sealant. Additionally, it is a temporary solution if the tyre is losing air despite multiple attempts to repair it.
Do I Need To Remove The Tyre Completely From The Rim?
Yes, you need to remove the tyre from the rim to convert a tubeless tyre to a tube one.
There you have it, steps to insert a tube in a tubeless tyre. Tubeless tyres are more durable and resistant to puncture than their conventional counterparts. Moreover, they enhance driving safety. It is only recommended to add a tube in a tubeless tyre as a temporary replacement. Furthermore, it is advised to let a professional handle the task if you are unaware of the process.
Be wary of early wear and tear factors for tyres and fix them at the earliest. For punctures, plugging a leaky tyre is also a viable option to keep the vehicle running.
The evolution of car tyres has witnessed the introduction of advanced types that are durable and more efficient. Browse through these new cars for sale in the UAE and explore a wide range of vehicles available with region-specific tyres and an array of features.
Stay tuned to dubizzle’s auto blog for handy car maintenance tips and more.


