
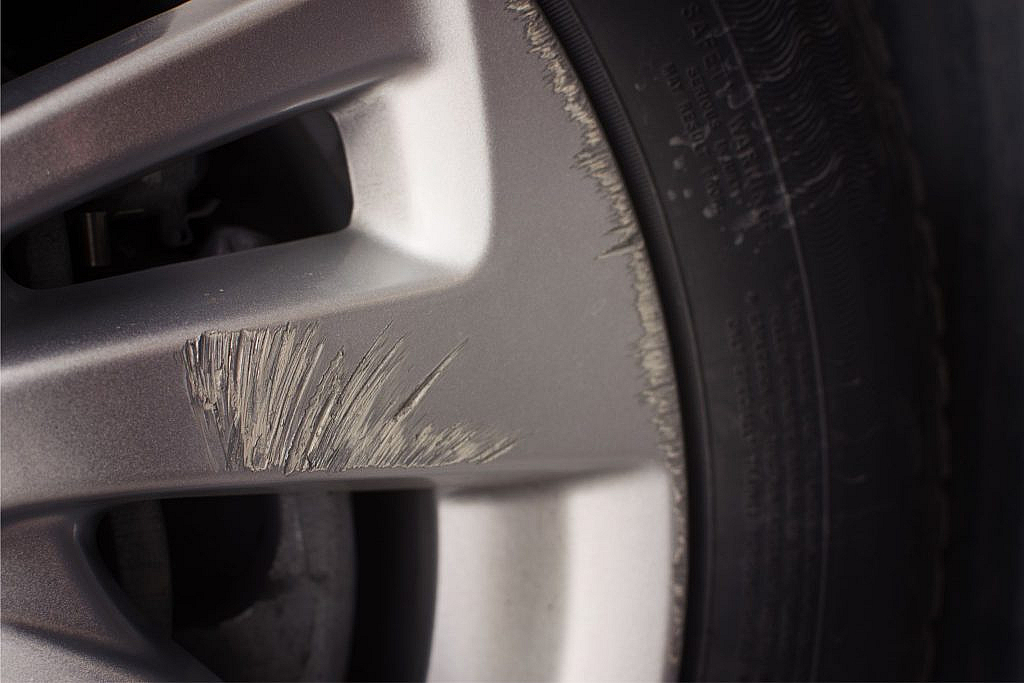
Scratched rims can significantly detract from the appearance of your vehicle, making it look worn and neglected. Whether the damage is due to curb rash, road debris or improper cleaning techniques, repairing scratched rims can be a cost-effective way to maintain your car’s aesthetic appeal. Let us walk you through a step-by-step process to fix a scratched rim, helping you achieve a professional-looking finish without breaking the bank.
Types of Rim Scratches
Before going through the repair process, it’s essential to understand the types of scratches and the materials needed for the job. Minor scratches can often be fixed at home with basic tools and materials. However, extensive damage may require professional assistance.
- Minor Scratches: These are superficial and only affect the surface layer of the rim. They can usually be polished out or filled with touch-up paint.
- Moderate Scratches: These penetrate deeper into the rim’s surface and may require sanding and filling before polishing.
- Deep Scratches: These scratches are and may expose the metal beneath the finish. They often require professional repair or replacement.
Step-by-Step Guide to Fixing Scratched Rims
Scratched or curb-damaged rims are not only unsightly but can impact the overall impression of your vehicle’s condition and value. Here are some simple rim repair steps that can help you restore this car wheel to its original appearance.
Materials Needed
- Mild soap or a rim-cleaning solution to clean the rim before repair.
- Soft brush or a sponge for gentle scrubbing.
- Microfiber towels or clean cloths for drying and polishing.
- Fine-grit sandpaper (800–1000 grit) for smoothing out scratches.
- Touch-up paint or a rim repair kit for filling deeper scratches.
- Polishing compound for buffing the rim to a shine.
- Protective gloves and safety glasses for protecting yourself during the repair process.
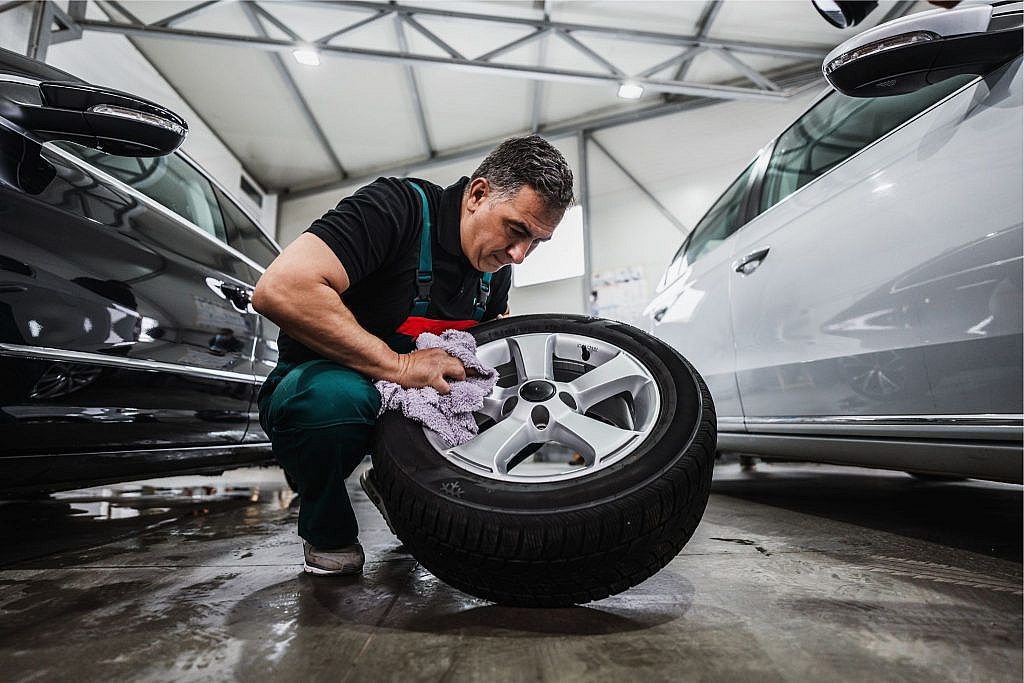
Step 1: Clean the Rim
Begin by thoroughly cleaning the rim using mild soap or a specialised rim-cleaning solution. This step is crucial as it removes dirt, grime and brake dust that could interfere with the repair process. All you need to do is to follow these steps to clean the rim.
- Mix the cleaning solution with water.
- Dip a soft brush or sponge into the solution and gently scrub the entire rim surface.
- Pay particular attention to areas around the valve stem and centre cap.
- Rinse off the cleaner using a hose or a bucket of clean water.
Use microfibre towels or clean clothes to dry the rim completely. This prevents water spots and ensures a smooth surface for the next steps.
Step 2: Sand the Scratched Area
Before sanding, inspect the scratch to determine its depth. If it’s minor, fine-grit sandpaper should suffice. For deeper scratches, you may need to start with coarser grits.
For minor scratches, use fine-grit sandpaper to sand the area lightly. Sand in circular motions to smooth out imperfections without applying excessive pressure.
Always sand in the direction of the rim’s finish to avoid creating new scratches. Also, use a sanding block for larger areas to maintain even pressure and prevent uneven wear.
Step 3: Fill Scratches (Optional)
If sanding doesn’t completely remove the scratch, you may need to fill it. Use touch-up paint or a filler from a rim repair kit specifically designed for your rim type (aluminum, chrome, etc.). All you need to do is to follow these steps:
- Apply a small amount of filler to the scratched area using a putty knife.
- Spread it evenly, ensuring the filler is flush with the surrounding surface.
- Allow the filler to dry completely, according to the product instructions.
Once dry, sand the filled area again with fine-grit sandpaper to achieve a smooth finish.
Step 4: Buff and Polish
Apply a small amount of polishing compound to a clean microfiber cloth. This will help remove any remaining imperfections and bring out the shine. When ready, proceed as follows:
- Buff the repaired area in circular motions until it blends with the surrounding surface.
- Continue polishing until all imperfections are removed and the rim looks even.
- For more stubborn scratches, apply multiple layers of polish, allowing each layer to dry before buffing again.
Step 5: Final Cleaning
After polishing, clean the rim once more to remove any residue from sanding or polishing. Dry the rim thoroughly with microfiber towels to prevent water spots and ensure a shiny finish.
FAQs
What if the scratch is too deep to fix at home?
If the scratch is deep or extensive, it may be best to seek professional help. Professionals have the tools and expertise to repair or replace damaged rims effectively.
How do I prevent car scratches in the future?
To avoid scratches, practice regular cleaning with gentle products, avoid tight parking spots and use rim protectors.
Can I use household items to polish my rims?
While some household items like baking soda and water can be used for minor polishing, they may not provide the same level of shine as specialised polishing compounds. Always use products specifically designed for automotive use to ensure safety and effectiveness.
By following these simple steps to fix a scratched rim and using the right materials, you can restore your its appearance and prevent corrosion. Thinking of replacing instead of repairing? If your rims are beyond DIY repair or you’re simply looking for an upgrade, you can buy rims in Dubai from trusted retailers offering a wide range of designs, sizes and finishes.
Or, if you’re contemplating a full upgrade, explore a wide selection of used cars for sale in the UAE that fit your lifestyle and budget.
Stay updated with the dubizzle’s auto blog for practical car maintenance tips.


